
To remove window restrictors, follow these simple steps. First, open the window completely. Next, identify the restrictor mechanism, usually located on the window frame. Use a screwdriver or the appropriate tool to loosen and remove the screws securing the restrictor.
Be cautious to avoid damaging the window or frame. If you encounter resistance, double-check for any additional screws or locking mechanisms. Once all screws are removed, gently take out the restrictor.
After removal, ensure the window operates smoothly. Always prioritize safety and consider professional help if needed. Remember, this process may vary slightly depending on the type of window restrictor installed.
How to Ensure Safe Window Restrictor Removal?
Prepare Properly
Understand the type of window you’re dealing with, as different windows may have unique mechanisms for their restrictors.
Be aware of any local building codes or regulations pertaining to window safety. Ensure compliance with these guidelines.
Gather Necessary Tools
Screwdrivers: Use the appropriate screwdrivers to remove screws holding the window restrictor in place. Choose the correct size and type based on the screw heads.
Pliers: Have pliers on hand for gripping and turning components. This helps in a controlled and safe removal process.
Utility Knife: If sealants or adhesives are present, use a utility knife to carefully cut through them, allowing for easier removal without causing damage.
Wear Safety Gear
Gloves: Protect your hands with sturdy gloves to avoid cuts or abrasions. This is particularly important when handling tools or sharp components during the removal.
Safety Glasses: Shield your eyes with safety glasses to prevent debris, dust, or small particles from causing eye injuries.
Secure the Work Area
Remove any obstacles or items near the window to create a clear and safe workspace. This minimizes the risk of tripping or knocking things over during the removal process.
Ensure proper lighting to clearly see and assess the components you’re working on. Well-lit spaces contribute to safer working conditions.
Follow a Step-by-Step Process
Open the Window: Before starting the removal, open the window fully to access the restrictor components easily.
Inspect the Mechanism: Examine the window restrictor mechanism thoroughly to understand its structure and how it is attached to the window frame.
Apply Gentle Pressure: When using tools, apply gentle and controlled pressure to avoid sudden movements or force that could lead to accidents.
Enlist Assistance if Needed
For Larger Windows: If dealing with larger windows or heavier components, consider enlisting the help of a second person to ensure safe and controlled removal.
Professional Assistance: If unsure or if the window restrictor removal seems complex, consider seeking professional assistance to avoid potential risks.
Post-Removal Check
Window Functionality: After removal, check the window’s functionality to ensure it opens, closes, and locks properly.
Childproofing Alternatives: Implement alternative safety measures, such as installing window guards or ensuring constant adult supervision, especially if the removal affects childproofing.
What Are Easy Ways to Identify Window Restrictors?
Identifying window restrictors is an essential step before attempting to remove them. Here are easy ways to identify window restrictors
Examine the Window Frame
Look for any visible devices or attachments on the window frame. Restrictors are typically installed along the sides or top of the window.
Check for Labeled Parts
Some window restrictors may have labels or markings indicating their purpose. Look for any engraved symbols, words, or logos on the window frame or the restrictor itself.
Operate the Window
Attempt to open the window. If a restrictor is present, it may hinder the window from fully opening. Take note of any resistance or stops in the window’s movement.
Inspect the Hinges
Examine the window hinges for additional components. Some restrictors are integrated into the hinge system and may be visible when the window is partially opened.
Review Window Documentation
Consult the window manufacturer’s documentation or user manual. It often provides information about any safety features, including window restrictors.
Look for External Attachments
Check for any external attachments or devices connected to the window frame. Restrictors may be secured with screws, and these attachments are often visible upon inspection.
Consider Window Age
Older windows may have visible or exposed restrictors, while newer models might have integrated or concealed systems. Understanding the window’s age can provide insights into the type of restrictor present.
Search Online Resources
Use online resources and image searches to identify common types of window restrictors. Compare the images with what you observe on your window to confirm the presence of a restrictor.
Ask the Manufacturer or Installer
Contact the window manufacturer or the installer if you are unsure. They can provide information about the specific features of your windows, including whether restrictors are installed.
Observe Window Behavior
Pay attention to how the window operates. If it only opens partially or has a mechanism that prevents it from fully opening, it likely has a window restrictor in place.
How Do I Safely Remove Window Restrictors?
Safely removing window restrictors requires a systematic approach to minimize the risk of damage and ensure a smooth process. Here’s a step-by-step guide
Understand the Type of Restrictor
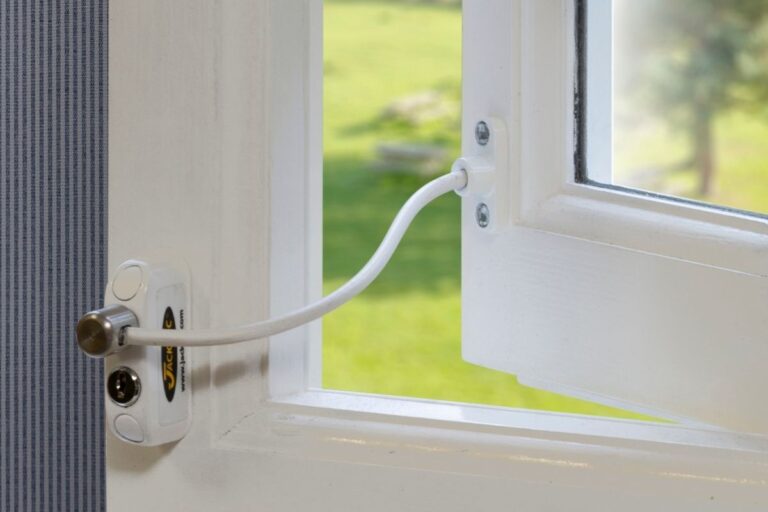
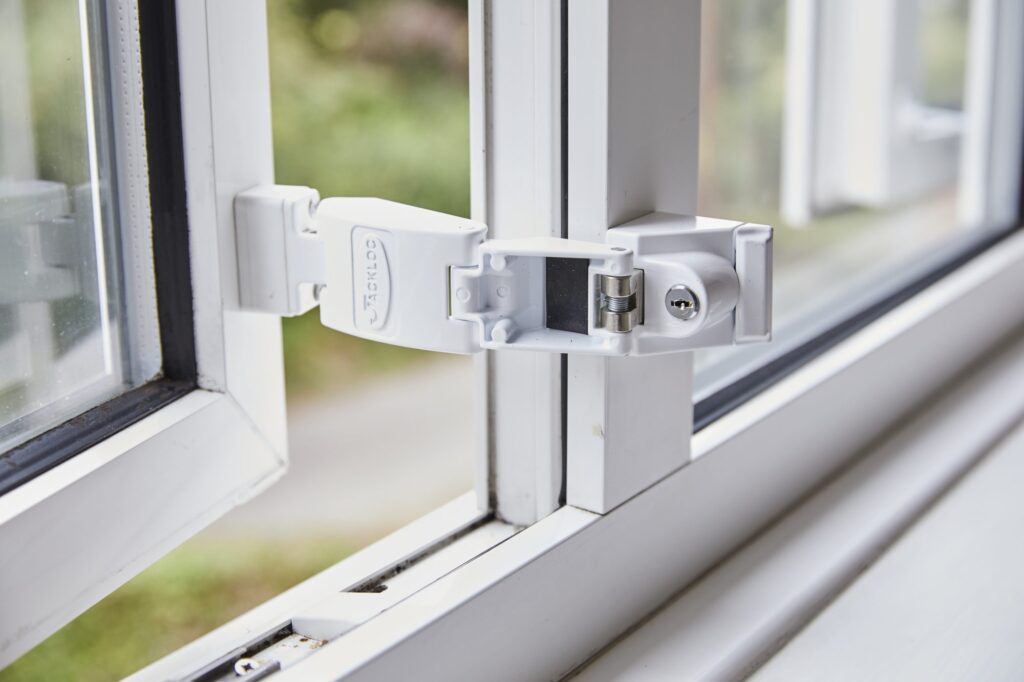
Identify the type of window restrictor you have, as different types may require different removal methods. This could include simple latch systems, cable restrictors, or hinge-based restrictors.
Check for Screws or Fasteners
Inspect the window frame for any visible screws or fasteners securing the restrictor. These are typically located near the hinge or along the sides of the window.
Gather Necessary Tools
Collect the tools required for removal, such as the appropriate screwdriver (Phillips or flathead), pliers, and potentially a utility knife for cutting through any sealants or adhesives.
Open the Window Fully
Ensure the window is fully open to provide easy access to the restrictor components. This allows for a better view of the attachment points.
Remove Screws or Fasteners
Use the screwdriver to carefully remove any screws or fasteners holding the restrictor in place. Keep track of these screws, as you’ll need them for reinstallation if necessary.
Check for Additional Attachments
Inspect the window frame for any additional attachments, such as clips or brackets. Remove them using the appropriate tools.
Examine for Sealants or Adhesives
If the restrictor is secured with sealants or adhesives, carefully use a utility knife to cut through them. Take your time to avoid damaging the window frame.
Gently Wiggle and Detach
With screws, fasteners, and any additional attachments removed, gently wiggle the restrictor to detach it from the window frame. Exercise caution to prevent any sudden movements.
Inspect for Hidden Components
After removing the visible components, inspect the window frame for any hidden or integrated components. Some restrictors may have multiple parts that need to be disengaged.
Document the Removal Process
Take note of the steps and components during the removal process. This documentation can be useful for reinstallation or for providing information to professionals if needed.
Ensure Window Functionality
After removal, test the window to ensure it opens, closes, and locks properly. Confirm that the removal has not affected the window’s functionality.
Consider Childproofing Alternatives
If removing restrictors for childproofing reasons, implement alternative safety measures such as window guards or constant adult supervision.
What are Common Problems in Removing Window Restrictors and How to Solve Them?
Removing window restrictors may pose challenges, but with careful consideration and problem-solving, you can overcome common issues. Here are some potential problems and solutions
Stuck or Rusted Screws:
Screws securing the restrictor may be stuck or rusted, making removal difficult.
Apply a penetrating oil or rust dissolver to loosen the screws. Use a screwdriver with a good grip and apply controlled force to turn the screws.
Integrated Mechanisms
Some window restrictors are integrated into the window hinges or frames, making removal less straightforward.
Consult the window manufacturer’s documentation or seek professional advice. Integrated systems may require specialized tools or professional assistance.
Hidden Attachments
Hidden clips or attachments may not be immediately visible, complicating the removal process.
Carefully inspect the entire window frame, including the hinge area, for hidden components. Refer to the manufacturer’s documentation for insights into potential hidden attachments.
Sealants or Adhesives
Restrictors may be secured with sealants or adhesives, making them challenging to detach.
Use a utility knife to cut through the sealants or adhesives carefully. Apply gentle pressure and take your time to avoid damaging the window frame.
Fragile Window Frame
Older or fragile window frames may be susceptible to damage during removal.
Exercise extreme caution and use the least amount of force necessary. Consider professional assistance if the window frame is delicate or if you’re uncertain about the removal process.
Complex Restrictor Designs
Some window restrictors have intricate designs that may not be immediately clear on how to remove them.
Refer to the manufacturer’s instructions or seek guidance online for specific types of window restrictors. Understanding the design can help in determining the appropriate removal method.
Lack of Documentation
No documentation or information is available about the window restrictor installation.
Contact the window manufacturer or installer for guidance. They may provide insights into the installation and removal process.
Difficult Access
Limited space or difficult access to certain areas of the window frame may hinder the removal process.
Use tools with flexible shafts, such as screwdriver extensions, to reach tight spaces. Alternatively, consider partial disassembly of surrounding components to create more accessible space.
Mismatched Tools
Using the wrong tools or inadequate equipment may impede the removal process.
Ensure you have the correct tools for the job. If necessary, consult the manufacturer’s recommendations or seek advice from professionals.
Window Misalignment
Removing the restrictor may cause the window to be misaligned or not close properly.
Realign the window by adjusting hinges or other components. Follow the window manufacturer’s guidelines for adjustments.
FAQ
How do you stop a window from opening all the way?
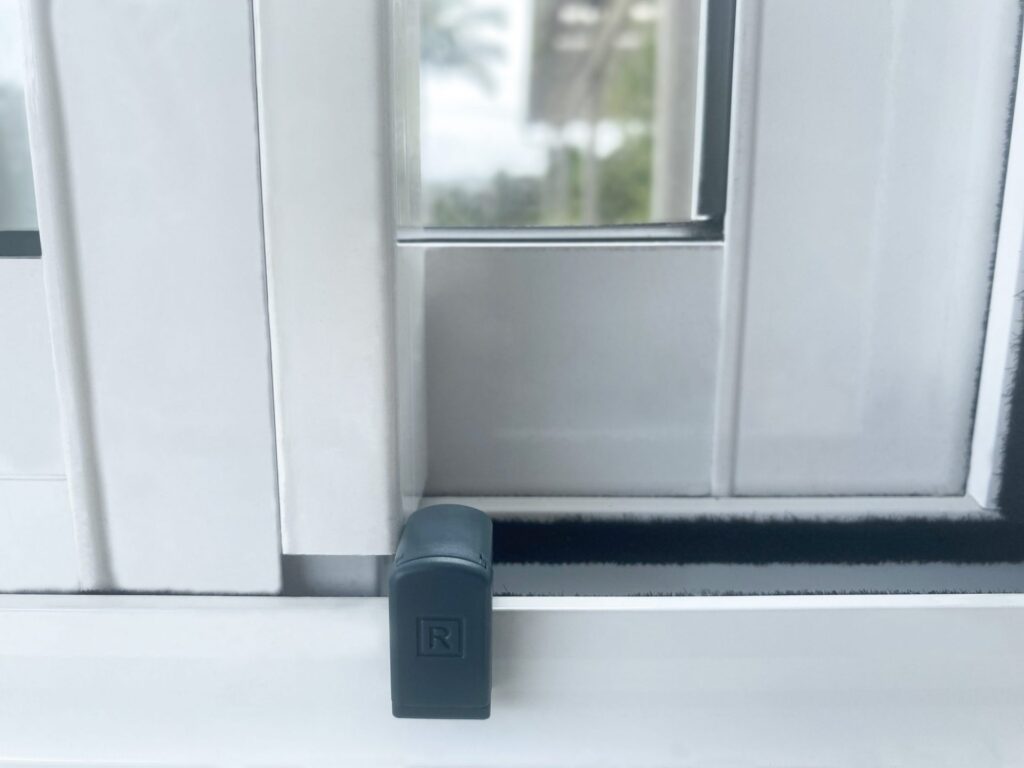
To prevent a window from opening fully, consider installing a window restrictor or wedge along the frame. This simple solution restricts the window’s range of motion, allowing controlled ventilation while maintaining security.
How do you remove a sliding window lock?
Removing a sliding window lock involves locating and unscrewing the screws securing it to the window frame. Once the screws are removed, the lock can be easily taken off, allowing for window operation without the lock in place.
How do you remove a window sash lock?
To remove a window sash lock, start by identifying the screws holding it in place. Use a screwdriver to unscrew these, and then gently detach the sash lock from the window. Be cautious to avoid damaging the window frame during the removal process.
How do you remove a sliding window roller?
Removing a sliding window roller typically involves accessing the roller adjustment screws on the window frame. By loosening these screws, you can detach the roller assembly, allowing for replacement or repair as needed.
How do you fix a window latch?
Fixing a window latch may require adjusting its alignment or tightening loose screws. Inspect the latch mechanism for any obstructions, and ensure it properly engages with the window catch. If the latch is damaged, consider replacing it for optimal functionality.
Why won’t my sliding window open?
If your sliding window won’t open, check for debris or dirt in the window track impeding movement. Additionally, inspect the rollers and tracks for damage. Lubricate the tracks and rollers with silicone spray for smoother operation. If issues persist, professional assistance may be needed to address underlying problems.
Final thoughts
Taking off window restrictors requires careful steps to stay safe and prevent issues. Identify the restrictor type, use the correct tools, and handle common problems like stuck screws. Follow the manufacturer’s guidelines, and if you’re unsure, consider professional assistance.
Test the window after removal to ensure it works well. Safety is crucial, so take your time and seek help if needed. Now, you have the know-how to remove window restrictors safely and make any necessary adjustments.