
The most common reasons for a dehumidifier leaking are:
- Full Water Tank: The water collection tank is full and needs to be emptied.
- Improper Positioning: The unit is not level or is tilted, causing improper drainage.
- Blocked or Disconnected Drain Hose: If the dehumidifier has a hose for continuous drainage, check for blockages or disconnections.
- Dirty or Clogged Filter: A dirty or clogged filter can lead to excess condensation and leaks. Clean or replace the filter.
- Refrigerant Issues: Malfunctions in the refrigeration system may cause excess condensation. This requires professional attention.
Addressing these issues should help resolve the leaking problem with your dehumidifier.
Introduction to why is my dehumidifier leaking
Dehumidifiers are important for keeping indoor spaces comfy and healthy because they lower the extra moisture in the air.
High humidity can lead to various problems, including mold growth, musty odors, and damage to furniture and electronics. Dehumidifiers help mitigate these issues by extracting moisture from the air, creating a more pleasant living or working space.
Despite their essential role, users often encounter common issues associated with dehumidifiers, and leaks are among the most prevalent concerns.
Water leakage can occur for various reasons, ranging from improper maintenance and usage to equipment malfunctions.
Common Causes of Dehumidifier Leaks
Water Tank Issues
- Tank Overflow:
Dehumidifiers are equipped with water tanks to collect the moisture they extract from the air. If the tank reaches its maximum capacity and overflows, it can lead to leaks. Users should be mindful of emptying the tank regularly to prevent this issue.
- Incorrect Positioning:
Placing the dehumidifier on an uneven surface or at an incorrect angle can disrupt the proper functioning of the water tank.
This misalignment may cause water to accumulate in areas where it shouldn’t, resulting in leaks. Users should ensure that the dehumidifier is placed on a level surface.
Drainage Hose Problems
Blockages:
Dehumidifiers often have the option to use a drainage hose to expel water continuously. If this hose becomes blocked or obstructed, it can force water back into the tank, causing overflow and leaks.
Regularly inspecting and clearing any blockages in the drainage hose is essential.
Disconnections:
Sometimes, the drainage hose may become disconnected either from the dehumidifier or the external drainage system.
This disconnection can lead to water pooling around the unit. Users should periodically check the hose for secure connections.
Filtration System
- Clogged or Dirty Filters:
Dehumidifiers are equipped with filters to trap dust and other particles present in the air. Over time, these filters can become clogged or dirty, hindering the unit’s efficiency.
Reduced efficiency may result in increased condensation, contributing to leaks. Regular cleaning or replacement of filters is crucial for optimal performance.
- Impact on Condensation and Leakage:
The filtration system plays a role in regulating condensation within the dehumidifier. A compromised filtration system may lead to excessive condensation, increasing the likelihood of leaks.
Users should be aware of the connection between the filter’s condition and potential water leakage.
Environmental Factors
Low Room Temperature
Freezing and Thawing Issues:
- In colder environments, the water collected by the dehumidifier may freeze, leading to potential issues. If the freezing occurs within the unit or drainage system, it can impede normal operation and contribute to leaks.
- Users should be cautious in colder climates and take preventive measures to avoid freezing, such as adjusting settings or using a dehumidifier designed for low-temperature operation.
Utilizing Defrost Mode:
- Many modern dehumidifiers come equipped with a defrost mode to address freezing issues. This mode helps prevent the freezing of internal components and drainage systems by periodically warming up the unit.
- Users should activate and utilize the defrost mode as needed, especially in colder conditions, to maintain the efficiency of the dehumidifier.
Extremely Low Humidity Settings
Overworking the Dehumidifier:
- Setting the dehumidifier to extremely low humidity levels may lead to overworking the unit. When the humidity is already low, the dehumidifier may continue to operate excessively, potentially causing condensation and leaks.
- Users should be mindful of the current humidity levels in the environment and set the dehumidifier to an appropriate level that balances effective moisture removal without unnecessary strain on the unit.
Adjusting Humidity Levels for Optimal Performance:
- It’s essential for users to find the right balance when setting humidity levels on their dehumidifiers.
- Adjusting the unit to maintain a comfortable and healthy humidity range, typically between 30% and 50%, ensures optimal performance without overworking the device. This helps prevent unnecessary condensation and potential leakage issues.
Understanding the impact of environmental factors on dehumidifier performance is crucial for users to make informed decisions in different conditions.
By addressing issues related to low room temperatures and extremely low humidity settings, users can enhance the efficiency of their dehumidifiers and minimize the risk of leaks.
Regular monitoring and adjustments based on environmental conditions contribute to a more reliable and effective operation of the unit.
Advanced Issues
Refrigerant Problems
- Potential Malfunctions:
Dehumidifiers rely on a refrigeration system to cool and condense moisture from the air effectively. Refrigerant issues, such as leaks or insufficient levels, can result in a malfunctioning system.
When the refrigeration system is compromised, the dehumidifier may fail to extract moisture adequately, leading to increased condensation and potential leaks.
Users should be vigilant for signs of refrigerant problems, such as a decrease in moisture removal efficiency or unusual noises, and address them promptly.
- The Need for Professional Attention:
Refrigerant-related problems are complex and typically require professional attention. If users suspect issues with the refrigeration system, it is advisable to consult with a qualified technician or the manufacturer’s customer support for guidance.
Attempting to repair refrigerant problems without the necessary expertise can worsen the situation and may void the warranty. Professional diagnosis and repair are crucial to ensuring the continued functionality of the dehumidifier.
Users should prioritize seeking professional assistance when faced with complex malfunctions to avoid further complications and to ensure that the unit operates at peak efficiency.
How to Troubleshoot and Fix Leaks
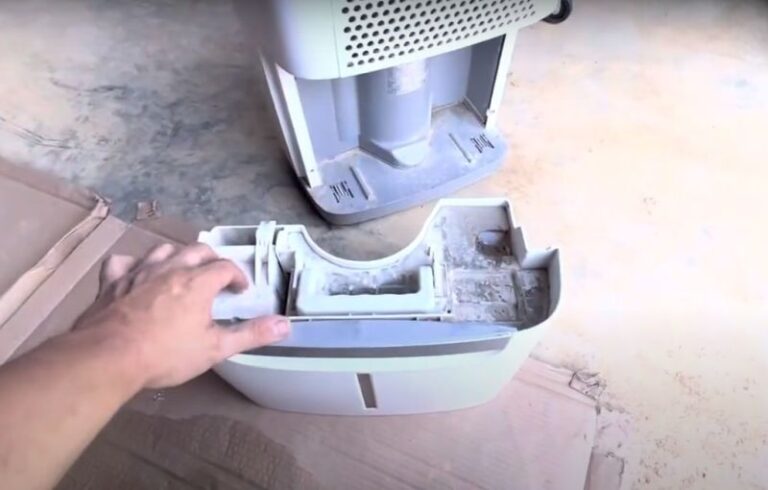
Step-by-Step Guide for Checking and Emptying the Water Tank
Step 1: Power Off:
Before handling the water tank, turn off the dehumidifier to ensure safety.
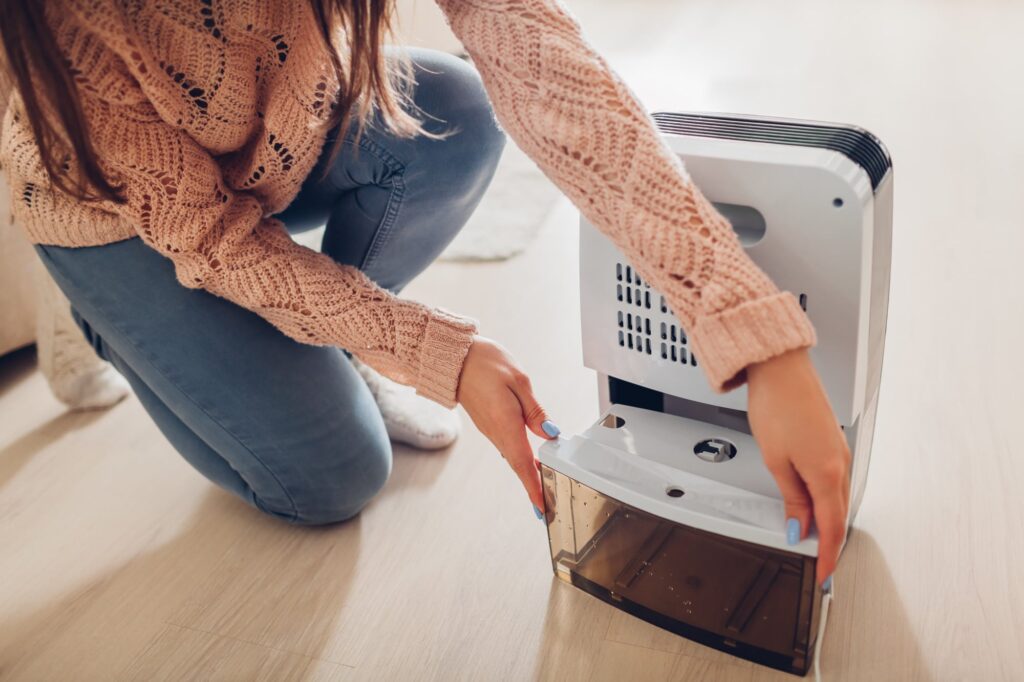
Step 2: Locate the Water Tank:
Identify the water tank location on the dehumidifier. It is usually a removable compartment at the front or back of the unit.
Step 3: Check Water Level:
Inspect the water level indicator or directly assess the water level in the tank. If it’s nearing capacity, proceed to the next step.
Step 4: Power On:
If the dehumidifier has an auto-shutoff feature, turn it back on after emptying the water tank.
Step 5: Empty the Tank:
Carefully remove the water tank and empty its contents into a suitable drainage area.
Step 6: Replace the Tank:
Ensure the water tank is securely placed back into its original position.
Inspection of the Drainage Hose
Step 1: Power Off:
Turn off the dehumidifier to prevent accidents during inspection.
Step 2: Locate the Drainage Hose:
Identify the drainage hose connection points, both on the dehumidifier and where it drains externally.
Step 3: Check for Blockages:
Inspect the hose for any visible blockages. Clear any debris that might be obstructing the flow.
Step 4: Secure Connections:
Ensure that the drainage hose is securely connected to both the dehumidifier and the external drainage system.
Step 5: Test the Drainage:
Turn on the dehumidifier and observe the drainage hose for any signs of leaks during operation.
Cleaning or Replacing the Filter
Step 1: Power Off:
Turn off the dehumidifier before attempting to clean or replace the filter.
Step 2: Locate the Filter:
Identify the filter compartment, usually located at the front or back of the dehumidifier.
Step 3: Remove the Filter:
Take out the filter according to the manufacturer’s instructions.
Step 4: Clean or Replace:
If reusable, clean the filter according to the user manual. For non-reusable filters, replace them with compatible replacements.
Step 5: Reinstall the Filter:
Place the cleaned or new filter back into its compartment, ensuring it is securely positioned.
Adjusting Environmental Settings
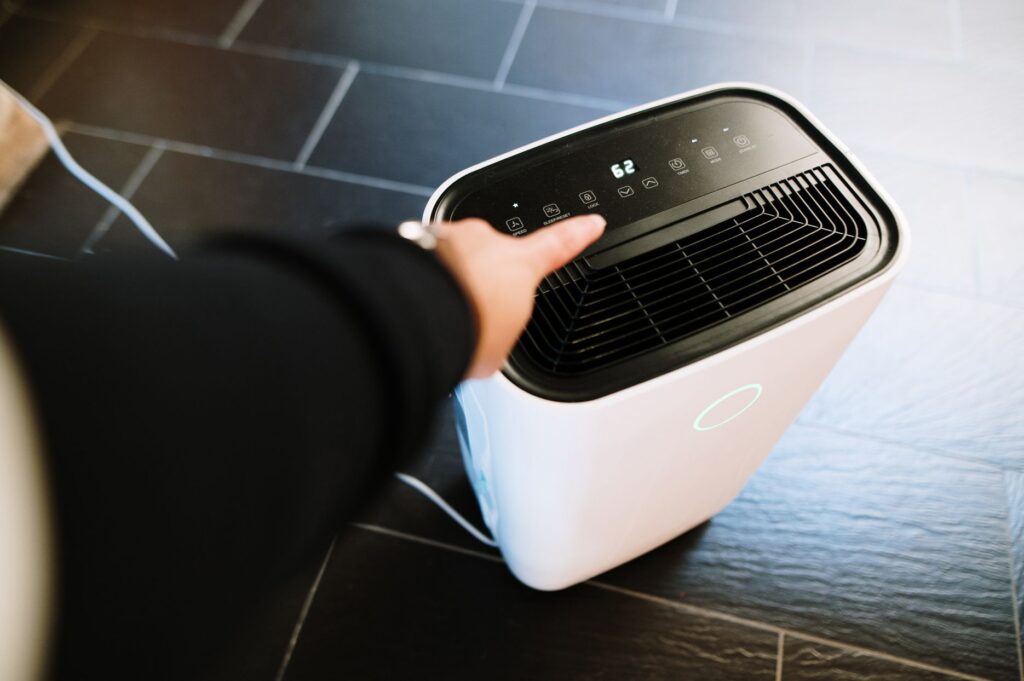
- Access Settings:
Refer to the dehumidifier’s user manual to understand how to access and adjust settings.
- Check Humidity Levels:
Ensure that the dehumidifier is set to an appropriate humidity level for the current environment, typically between 30% and 50%.
- Avoid Extreme Settings:
Refrain from setting the dehumidifier to extremely low humidity levels, as this may lead to overworking the unit.
- Consider Environmental Factors:
Be mindful of the room temperature, especially in colder conditions. If necessary, activate the defrost mode to prevent freezing issues.
By following this step-by-step guide, users can troubleshoot and address common issues that may lead to dehumidifier leaks.
If problems persist, it is recommended to seek professional assistance, especially for advanced issues like refrigerant problems.
Preventive Maintenance Tips
Regular Cleaning Routines
Clean the Water Tank:
Empty and clean the water tank regularly to prevent the buildup of bacteria and mold. Use a mild detergent and water for cleaning.
Wipe Down Surfaces:
Periodically wipe down the exterior surfaces of the dehumidifier to remove dust and dirt. A clean exterior helps maintain optimal airflow.
Clean the Filter:
Follow the manufacturer’s guidelines for cleaning or replacing the filter. Clean reusable filters at least once a month to ensure efficient operation.
Inspect Drainage Components:
Check the drainage hose and drainage system for any debris or blockages. Clear any obstructions to maintain proper water flow.
Monitoring Humidity Levels
Use a Hygrometer:
Get a hygrometer to keep an eye on how humid the room is. This helps you set your dehumidifier just right.
Set Appropriate Humidity Levels:
Keep the dehumidifier set to maintain a comfortable humidity level, typically between 30% and 50%. Adjust settings based on seasonal changes.
Be Mindful of Environmental Changes:
During extreme weather conditions, such as very cold or hot periods, monitor the dehumidifier’s performance and adjust settings as needed.
Professional Maintenance Recommendations
Scheduled Inspections:
Consider scheduling regular professional inspections, especially if the dehumidifier is used continuously or in challenging environments.
Addressing Advanced Issues:
If you experience persistent problems or advanced issues, seek professional assistance promptly. Attempting complex repairs without expertise can lead to further damage.
Follow Manufacturer Guidelines:
Adhere to the manufacturer’s maintenance guidelines outlined in the user manual. This includes recommended service intervals and any specific instructions for your dehumidifier model.
FAQs
Why is my dehumidifier leaking water?
The drain hose or collection bucket may be improperly positioned or not securely in place. Ensure proper installation according to the manufacturer’s instructions.
What should I do if water is leaking from the bottom of my dehumidifier?
Check for cracks or damage in the collection bucket, drain hose, or water reservoir. If any issues are found, replace or repair the damaged parts.
Why is my dehumidifier leaking onto the floor?
The unit may be tilted or not level. Ensure the dehumidifier is placed on a level surface to prevent water from leaking out.
Why is my dehumidifier leaking when it’s not in use?
Examine the unit for any residual water in the collection bucket or drain hose. Empty the water reservoir and check for proper drainage before storing the dehumidifier.
What causes a dehumidifier to leak after extended use?
Over time, the drain hose or collection bucket may develop wear or damage. Inspect these components for any issues and replace them if necessary.
How do I address a dehumidifier leaking from the coils?
Ice formation on the coils can cause leakage. Turn off the dehumidifier and allow it to thaw before restarting. If the issue persists, check for airflow obstructions and ensure proper ventilation.
What should I do if my dehumidifier leaks from the back or sides?
Check for any cracks or damage in the casing. If the casing is compromised, it may need repair or replacement to prevent further leakage.
How do I fix a dehumidifier that leaks excessively during high humidity?
In extremely humid conditions, the unit may struggle to keep up. Empty the collection bucket more frequently, ensure proper drainage, and consider using the continuous drainage option if available.
What should I do if none of the above solutions stop my dehumidifier from leaking?
If the problem persists, consult the user manual for specific troubleshooting steps. If the unit is still under warranty, contact the manufacturer’s customer support for assistance with repairs or replacement.
Conclusion
Dehumidifiers are essential for keeping indoor spaces comfortable and healthy, as they help tackle problems related to too much humidity.
However, users may encounter common challenges, with leaks being a prevalent concern.
And, maintaining a dehumidifier’s optimal performance involves understanding and addressing common issues such as leaks.
A proactive approach, including regular cleaning, monitoring humidity levels, and following professional maintenance recommendations, ensures a healthy indoor environment.